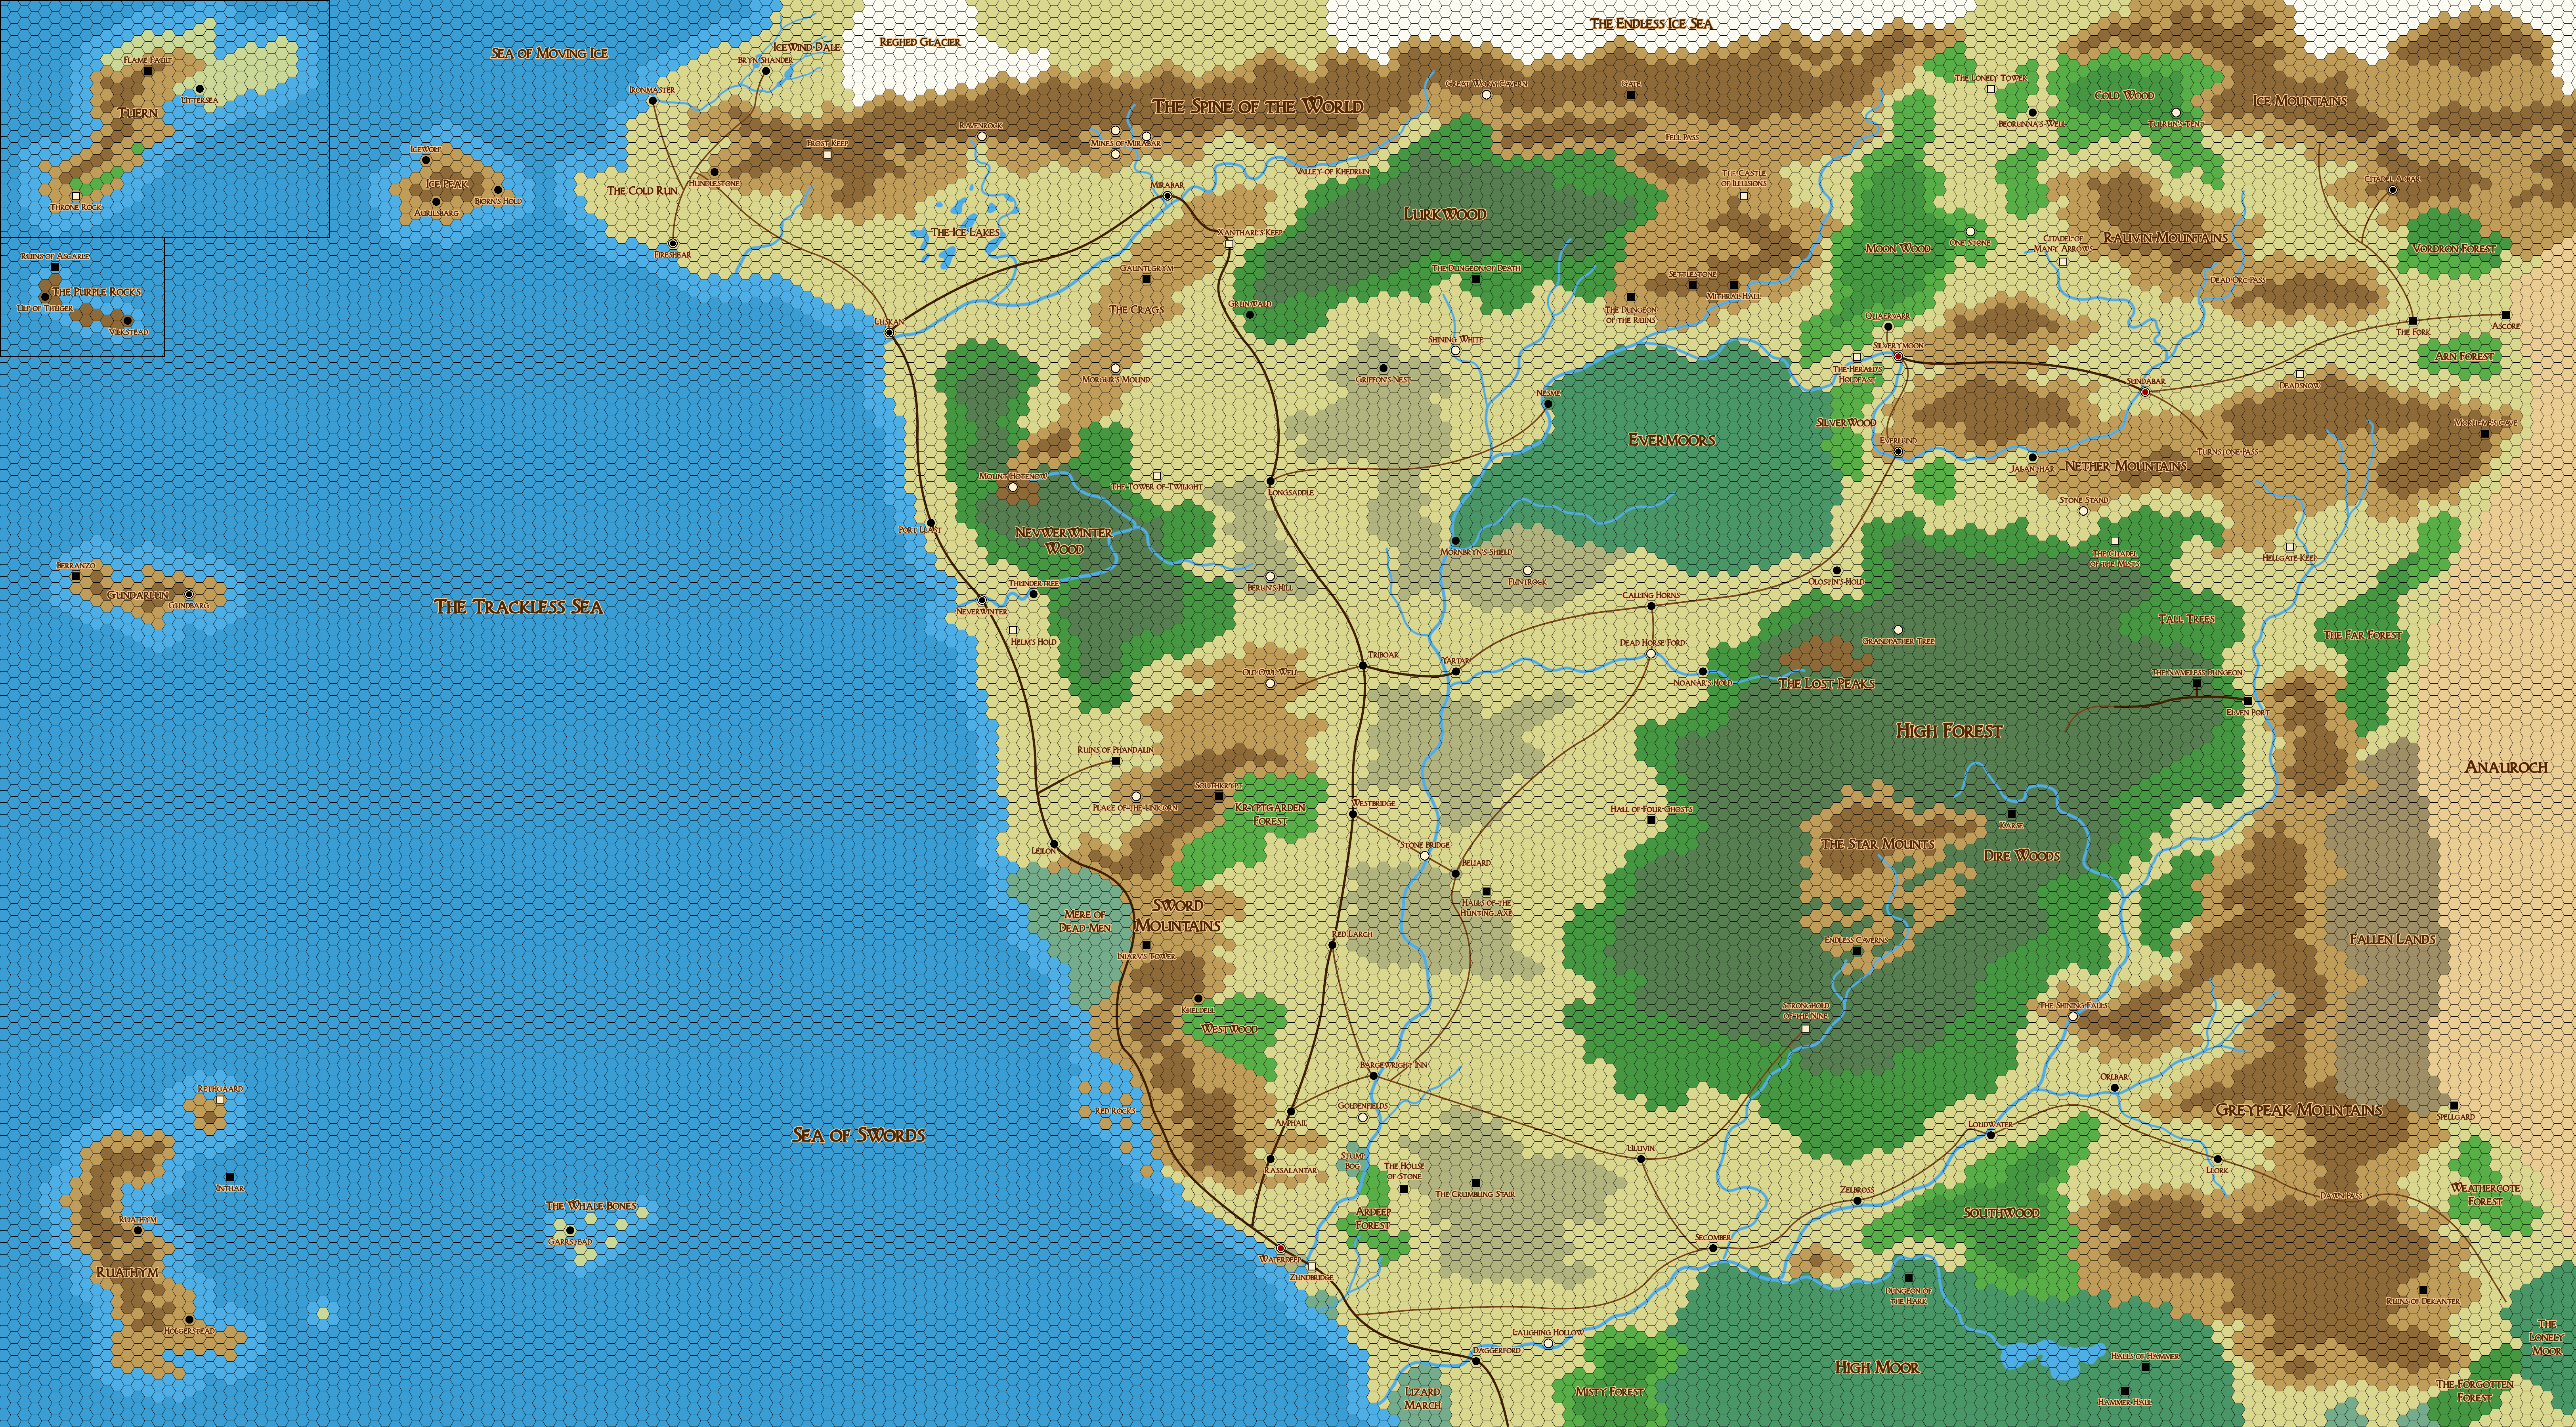
 Probably my most commented post on this site has been the hexmap of the Savage Frontier that I made nine years ago. I’ve always been very happy with it, but with a recent interest of starting a new campaign in the region, I’ve been thinking that I could do a lot better now. And here it is.
(Updated to new version from September 2023.)
The map is directly based on the map from the 1st edition sourcebook FR6: The Savage Frontier, with some additional markers from the 2nd edition The North box. This map uses a 6-mile hex grid over the original AD&D maps. 3rd and 4th edition Forgotten Realms uses considerably altered maps, so distances won’t match exactly with any of those sources. 5th edition maps of the Sword Coast seem to have returned to the original AD&D map shapes but slightly scaled down. Treating the hexes as 5 miles across should get very close to matching the distances of 5th edition sources.
This map comes in three versions. The GM map, which includes all the map markers and labels; the player version, which includes only those places that would be commonly shown on maps the PCs would have access to; and a blank map without any markers or text.
The Savage Frontier – Player Map
The Savage Frontier – blank map
The idea behind the three versions is that GMs can easily make their own custom maps showing the area relevant to their campaign or adventure and only include the places that the PCs in their campaign would know about. To make your own custom version, simply open the GM map and the blank map in GIMP, Photoshop, or a similar image editing program, with the blank map covering up the GM map below. Then make the blank map on top partly transparent and simply use the select tool and delete key to make holes through which the labels and text you want are visible. Then set the opacity back to 100% and export the map as a new file. You can then crop the new map file to only the area that you need to make it easier to handle or print out, or do whatever you want with it. Or you can take the blank map and draw whatever icons and text that you want. I would share the original .xcf file, but it’s over 200 MB in size, which is rather impractical.
Use the way in whatever way you like. All I ask for is a link to this page with the original files if you post or upload it somewhere else.
Hi, I’ve just discovered your blog and first I’d like to say that it looks very good, full of interesting ideas and suggestions for a GM. I cannot wait to read all your articles ^^.
As for this article, I’m currently running a short campaign in the Savage Frontier using SWADE (PCs are monsters in search of a new home after their dungeon has been “cleaned” by adventurers) and plan on running a longer (and more classic) one focused on Neverwinter and its surroundings (a spiral campaign approach). So, thanks a lot for this map, it is and will be very useful.
I’ve got a question about it though: what do the colors on the hexes mean? I get most of them (dark green/deep forest, medium green/normal forest, ivory/grassland, light turquoise/swamp, dark turquoise/moor), but there are some I’m still in doubt with. Light brown (Castle of Illusions) and dark brown (Mithril Hall) could be mountains and higher mountains, while light grey (Berun’s Hill) could be hills and light green (Westwood) some sort of bushy grassland, but I’d like to be sure about these last four colours, if you don’t mind.
Also, what software would you suggest if I’d like to create my own icons for the blank map? I’m not very skilled with map making tools, the only one I’ve used so far is dungeonscrawl (a spaceship for a scifi SWADE campaign I’m running) and it was a pita to create it, to the point where I now prefer to draw maps on paper and then scan/digitalize them if I ever need to use them in electronic format.
The original maps are not very clear on the different terrain types. The darker patches in the Dessarin valley are labled as “Rolling Hills” and the Fallen Lands as “Barren”. But there’s no explanation of how that’s different from the regular “Foothills” or “Rocky Desert”, or when something is marked as “Marsh” instead of “Swamp”. So I just stuck with keeping things in the same color that had the same color in the original maps.
I always use GIMP for anything where I want straight lines and hard edges, or Krita when I want something to look a bit like drawn with a brush. Other than that I don’t really know anything about graphics software or graphical design.